Paulie's MG5 upgrades blog, Wheels, Suspension, Foot rest, & much more!

Let's get started with some actual work then on this miserable, wet day.

Just a small job for today, removing the rear badging. This just looks terrible to my eye. All bunched up together, different sized letters, not even properly straight or aligned, it just looks nasty.

View attachment 32915

Here's how I remove badging without risking paintwork damage.

Start by washing around the badge area thoroughly with lots of soapy water and rinsing off. The idea here is to ensure there are no trapped particles of grit anywhere around the badging, as this could damage the paint during the removal operation.

I use a plastic card, credit card sized, as shown below, which I shave along the edge with a Stanley blade to create a very thin, sharper edge. I collect a few of these, whenever I go to our local hostelry for a carvery, they're on the bar advertising local businesses! They come in very useful for all sorts of scraping or filler spreading/smoothing jobs and don't damage paintwork!

View attachment 32914

Using the edge of the card with the area doused with soapy water regularly as I go, I slide the sharpened edge under the side of the badging, then saw it up and down whilst applying gentle pressure, until it cuts through the adhesive. It's important to keep the edge flat along behind the lettering and not to try levering the lettering off at all, if you do this, the chromed edges can be sharp and mark the paint, just cut all the way through and gently lift off the letters, one at a time. If you prefer, you can saw the letters off in a similar fashion with dental floss, or thin nylon fishing twine. Just ensure whichever way you do it, go slowly and lubricate with lots of soapy water.

Once the lettering is off, you'll be left with the remainder of the foam adhesive, well attached to the car. The next phase is to clean this off. I use white spirit. Start by soaking paper kitchen towel with it, then place it over the area and leave it to soften the adhesive residue for 10 minutes. Remove and carefully scrape as much of the residue off as possible with the edge of the card, or fingernails. It won't all come off at once. wipe the area clean and soak it again with more white spirit for another 10 minutes. Once it's nearly all gone, just polish off any residue left with a clean cloth damped with white spirit, until it's all clean. Finish by washing the area down with soapy water, rinse and dry off the area. Job done. :)

View attachment 32916

Lettering is undamaged and can be re-applied if desired by applying appropriate badge tape.

View attachment 32917

For now, I'm inclined to leave the car cleanly unbadged, but may consider re-applying some of the badging in a more appropriate place. The SW won't be going back on at all, but I might reuse the MG5 & EV badges as in the mock-up below.

What do we think, yes or no?

View attachment 32950

Or maybe just this, as does it really need a second MG as we already have the roundel?

View attachment 32951

We'll see, it's going to remain naked for now anyway. :)
Hey again Paulie, Do you know if anyone had debadged the main MG logo??
 
Now, lets have a look at a solution to the foot rest.

Removing the foam block was the easy part, but what do we do once it's out? Having looked at the carpet carefully, it's moulded a specific shape and won't invert, or allow itself to be reshaped easily whilst still looking OK or allowing the fitting of a different. lower, rest.

So after scratching my head for quite some time, measuring, measuring again, then spending literally hours trawling the net for alternative footrest ideas, a solution has come to me!

Sadly, the carpet does have to be cut carefully to allow the planned surgery. I've done half the job now. Removing the foam block, cutting the carpet, researching for a suitable alternative part and ordering said parts to finish the job. We'll have a look at that lot, then it's going to be a week or so before we can come back to finish off.

Before starting slide back the drivers seat as far as it goes. Remove any floor mats and vacuum the area clean. Get yourself a kneepad to kneel on as you'll be working through the open wide drivers door with knees on the ground! You might want to get a torch/light as well if it's not a bright and sunny day, as it's a bit dull down in the footwell.

To generally access the area of the foot rest and allow the carpet to be pulled back to remove the foam block that makes up the original rest, then to cut the carpet safely, we need to remove the side panel above the rest along with a plastic retaining nut behind the pedals. This is dead easy. You just unscrew the retaining nut, (circled in red) then gently pop out the centre of the plastic rivet fitting at the front top of the panel with a small screwdriver. This allows the rivet to disengage from the panel. You then just gently slide your fingers under the carpet at the base of the front of the panel and wiggle and pull it forward carefully to disengage two spring clips. The panel can then be carefully removed. See pictures below for reference.

View attachment 33374
View attachment 33379
View attachment 33378
View attachment 33377

Once you've done this, put everything safely out of the way

You can then fold back the carpet from the corner and wrestle it under the pedals. You'll now see the block of foam, or rather you won't, as it's cocooned in a thin layer of white foam, carefully cut/tear at this to expose the block and slide it out. You can then carefully cut back any remaining loose foam as needed and slide the carpet back in to place. Keep the block safe, we're going to need this later. It's going to be cut down to suit as support for the new lower rest.

The block removed:

View attachment 33380

Next, I cut the carpet out that made up the rest shape around the foam block, leaving a lip of around 10mm. You'll see I carefully cut around and retained the heel pad bonded to the carpet. This can then fold flat against the central tunnel area leaving no holes after the new pedal is fitted.

So this is what the area now looks like:

View attachment 33381

So that's all for now, but here's the plan. Shown below is what I propose to do:

View attachment 33382

As you can see, the side panel needs extending to fill the hole left by the removal of the old foot rest area. I intend to use 2mm grained black plastic sheet, cut to size and bonded (or plastic riveted, not sure yet) to the inside of the existing panel at the hatched area shown. This new section will also engage with the new rest, which is going to be a LHD VW group part, which has the right dimensions to fit perfectly (I think/hope!) with a little modification. The new rest will in turn be bonded to the existing foam block, trimmed to suit and the block will in turn be bonded (or maybe Velcroed for serviceability) to the floor section.

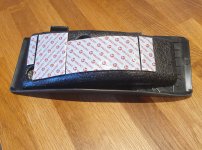
So, the parts currently en route, plastic sheet:

View attachment 33383

And the new foot rest itself:

View attachment 33384

Stay tuned...
I'm very glad to have come across this thread as the footrest is a complete pain in the leg (literally) Either the designer is a total moron who has never driven a car or has a very short left leg. Either way it's totally unfit for purpose so my first thought is to follow your instructions to remove it and then do nothing more at all. If I feel it I need a rest I'll look into the one you linked to so thanks mate, much appreciated.
 
I'm very glad to have come across this thread as the footrest is a complete pain in the leg (literally) Either the designer is a total moron who has never driven a car or has a very short left leg. Either way it's totally unfit for purpose so my first thought is to follow your instructions to remove it and then do nothing more at all. If I feel it I need a rest I'll look into the one you linked to so thanks mate, much appreciated.
This is one of the few occasions where something has been designed that perfectly suits my short legs.
 
This is one of the few occasions where something has been designed that perfectly suits my short legs.
I stand corrected. :)

Having said that I find that if I can comfortably reach the accelerator with my right leg then my left leg is in an uncomfortable position.
Probably a touch of sciatica doesn't help but I often find myself trying to squeeze my left foot under the brake pedal or between the brake pedal and the foot rest, which either way could be described as sub optimal from a safety point of view.
The foot rest as it is will only last a matter of hours now I've seen this thread but what will replace it is yet to be decided.
Yep, it's just intolerable, whoever signed off on it must be a very weird shape! I'll have an update on how I'm sorting mine soon, I've made some good progress and it's going to turn out really nicely but current weather and no access to garage space at the moment is hampering progress!
 
Yep, it's just intolerable, whoever signed off on it must be a very weird shape! I'll have an update on how I'm sorting mine soon, I've made some good progress and it's going to turn out really nicely but current weather and no access to garage space at the moment is hampering progress!
Maybe it was designed for Chinese legs. 😉
 
And yet another box of goodies has arrived! They're building up to quite the pile now, I really need to get some of these projects on the car moved on. Doesn't help that I've got hernia surgery in 2 weeks that will mean no significant physical straining for around 6 weeks following! You might have to be patient with me, progress might be a little slow...

But I digress, todays goody is a Brink Towbar kit.

Towbar1.jpg


A very nice quality kit, except the usual issue you get with all tow bars, naff paint, the 3 main sections have clearly been laser cut than welded to a very precise, quality standard, but then no deburring of the edges or removal of weld spatter prior to the application of a very thin coat of black paint. To most this doesn't matter one jot as it'll rust up nicely, hidden behind the bumper cover, out of sight, out of mind, and in any case, the car will be long gone in 3 years or so!

But, being weird and all, I can't have that, so will go over it with a flapper disc, file set, & production paper to get it prepared before a nice coat of black epoxy paint.

The advantage of self fitting, apart from being able to do the above save around £300 and generally do a better job all round than a fitter trying to complete the job in a limited time window, is you can also treat all the mating surfaces and the box sections the bar mounts into with cavity wax as well whilst the bumper cover is off. :)

For now though, it's going to have to wait patiently for it's turn down the list. Let's get back to that foot rest...

Maybe it was designed for Chinese legs. 😉
Nope, it would still only work if Chinese people had a left leg 4 inches shorter than their right! :ROFLMAO:
 
So, shall we finish the foot rest?

Why not...

We'd got to the stage of old rest gone, leaving a gaping hole, now we need to fill it.

The first job is to remove the mounting tabs from the back of the new cover using a Dremel or suitable alternative tool. These 5 bits have to come off.

pedal.JPG


Then with the aid of state of the art CAD, (Cardboard Aided Design... Wallace has nothing on me!) we establish the profile of the carpet, transfer this to the footrest cover, and trim it to match.

CAD work.jpg


We then trim down the original pedal support block to fill the hole as needed up to the new cover height. (Ignore the Velcro, it was an idea, but didn't work, so was removed!)

20250109_154457.jpg


The carpet was then finally trimmed to suit, so it could slide in the clips on the side of the new foot rest cover. The foam block was seated in place using a bed of suitable adhesive sealant, more sealant applied to the top of it, and the cover bedded into place.

20250111_115844.jpg


Hi tech weights were added to keep it in place against the carpet for 24 hours, whilst the sealant set.

20250111_114743.jpg


So far, so good. Now we need to fill the hole in the side trim panel left from the removal of original rest. After more CAD work, (which I forgot to photograph in my excitement) a suitable sized piece of grained black plastic was cut, finished, and bonded to the back of the panel.

20250111_120210.jpg


Not a perfect match, but close enough for where it sits. A couple more pics of the finished job.

20250111_143035.jpg


20250111_142955.jpg


I'm not entirely happy with how it's turned out aesthetically, having part of the original rest still showing to the side annoys me a little, but I just cant think of an alternative way it could be done that would look any better. I'd say I'm 90%+ satisfied with it, so that will have to do.

As for leg resting position... wow, it's just perfect now, much nicer to drive with my left leg finally able to rest where it should on longer journeys. This photo gives an idea of how much the rest has moved from it's original, far too high/close, position.

20250111_120210.jpg
 

Attachments

  • 20250109_154621.jpg
    20250109_154621.jpg
    611.8 KB · Views: 12
Last edited:
Excellent work.
I got all excited when I saw your towbar but then checked the specs and unfortunately 500kg wouldn't be enough for me.
I'll just stick to my EV converted Freelander for towing. :)
An electric Freelander sounds wonderful 🤩

An electric Freelander sounds wonderful 🤩
Well, probably doesn’t sound much at all, but definitely wonderful 🤪
 
How did you get on with the DVLA?
It took two inspections but passed so is now 100% legal. It took two inspections and they didn't say why they needed the 2nd but the MOT guys in the test centres that did the inspections were great. It was the DVLA in Swansea that were a pain.

This was a good while before it was finished so in the testing phase and before the 4WD was reinstated.


Nice car.
 
Nice car.
LOL, It's a lot nicer now I replaced it and have the wings back on.
I've always liked Freelanders and been an active member of the Landyzone forum. I already had this car but the paint was starting to peal off the roof plus it had a few other issues so this was just the test Mule. I bought another one with a duff engine and transplanted all the electrical stuff from this one into it so it is the newer (to me) one I took to the test centre.
 
Support us by becoming a Premium Member

Latest MG EVs video

MG Hybrid+ EVs OVER-REVVING & more owner feedback
Subscribe to our YouTube channel
Back
Top Bottom